


Most new beekeepers spend weeks choosing a hive type, a bee suit and a smoker, then place the hive wherever there happens to be free space. Location deserves more thought than that. Where you put your first hive affects how fast the colony builds up, how easy inspections are, how your neighbors feel about your bees and how well the colony gets through its first winter.
This guide walks you through the factors that matter most when you choose an apiary site: sun and shelter, water, forage, access, the flight path and the ground the hive sits on. At the end you will find a simple checklist you can take outside and use before your bees arrive.
Start with the rules and the people around you
Before you look at sunlight or soil, check what is allowed where you live. Some towns, homeowner associations and landlords have rules about keeping bees, such as how many hives are permitted, how far they must be from property lines or whether a water source is required. Rules vary a lot from place to place, so confirm them with your local authority or a nearby beekeeping association rather than relying on what someone did in another town.
Then think about the people who share the space. A hive that is out of sight and well placed rarely causes trouble. A hive next to a neighbor’s patio, a children’s play area or a busy sidewalk can turn a friendly street into a conflict. If someone in your household or next door has a known allergy to stings, take that seriously and talk about it before you set anything up.
Sun, shade and wind
Honey bees like warmth. A hive that gets morning sun warms up early, and the foragers start flying sooner in the day. That is why many experienced beekeepers face the entrance roughly toward the east or south-east, depending on their hemisphere and local conditions.
Full sun all day is not always ideal. In hot climates, light afternoon shade helps the colony avoid overheating, which means fewer bees spent fanning and carrying water. In cool or damp regions, more sun usually helps. Look at the spot at different times of day and, if you can, in different seasons. A place that is sunny in early spring may be shaded by leaves in summer, and the opposite happens in autumn.
Wind is the other half of the picture. Cold winds blowing straight into the entrance chill the cluster in winter and make it harder for foragers to land. Natural windbreaks such as a hedge, a fence or a building on the side of the prevailing wind make a noticeable difference. If there is nothing there, a simple screen of fencing panels or straw bales can do the job.
Avoid frost pockets and damp hollows
Cold air settles in low spots, and so does moisture. A hive in the bottom of a dip may sit in fog and frost long after the rest of the yard has warmed up. Damp conditions encourage mold on the combs and stress the colony. Slightly raised, well-drained ground is a better choice than the lowest corner of the property.
Water and forage
A colony uses a lot of water, especially in warm weather, to cool the hive and to dilute stored honey for feeding brood. If you do not provide water, the bees will find their own, and it may be a neighbor’s swimming pool, birdbath or dripping tap.
Set up a reliable water source near the hive before the bees arrive, so they learn to use it from the first day. Good options include:
- A shallow tray filled with pebbles or marbles so bees can land without drowning.
- A bucket with floating corks, wood chips or a piece of burlap.
- A slow drip from a hose onto a sloped board or a patch of moss.
Keep it topped up. Bees are creatures of habit, and once they adopt a water source they will keep using it.
Forage matters too, although you have less control over it. Foragers commonly fly a long way from the hive, so the plants within a wide radius count more than the flowers in your own garden. Even so, it helps to look around. Gardens, hedgerows, fruit trees, wildflower margins and parks are good signs. A site surrounded by large areas of a single crop that blooms for only a few weeks, or by land that is heavily treated with pesticides, can leave the colony short of food for long stretches of the year.
Plan the flight path
Bees leave the hive and climb toward their forage, then return along a similar line. That path is where people are most likely to meet a bee head-on. You can shape it.
If the entrance faces a fence, hedge or screen about two meters (six feet) away, departing bees are forced to fly up and over it. They then travel above head height instead of at face level. This one step does more to keep neighbors happy than almost anything else.
Also think about:
- Doors, gates and paths that people use every day; point the entrance away from them.
- Laundry lines, where bees may leave small spots of waste on clean sheets.
- Parked cars, which can collect the same spots near a busy hive.
- Lawns that will be mowed; mower vibration close to the entrance can make bees defensive.
Access, ground and hive stand
Beekeeping involves heavy lifting. A full honey super can weigh much more than most people expect, and you will need to carry boxes, frames, feeders and tools to and from the hive. Choose a site you can reach easily with a wheelbarrow or cart, in dry and wet weather.
Leave room to work. You should be able to stand beside or behind the hive, not in front of the entrance, with space to set boxes down during an inspection. A clear area of about a meter or so around the hive makes inspections calmer for both you and the bees.
The ground should be firm and level from side to side. A slight forward tilt helps rainwater drain out of the entrance instead of pooling inside. A sturdy hive stand keeps the bottom board off wet ground, makes it harder for some pests to reach the hive and saves your back by raising the boxes to a comfortable height. Keep grass and weeds trimmed in front of the entrance so the bees are not blocked.
Think about security and wildlife
In some areas, hives attract unwanted visitors. Depending on where you live, that could be skunks, raccoons, bears or simply curious people. Local beekeepers will know which threats are common in your region. Measures range from simple entrance reducers and raised stands to electric fencing in bear country. A site that is not visible from a public road also reduces the risk of theft or vandalism.
Common mistakes with first hive locations
Most location problems come from a few repeated mistakes. Watch out for these:
- Placing the hive in deep shade because it is the only empty corner of the yard.
- Facing the entrance toward a path, door or neighbor’s seating area.
- Forgetting water until the bees have already found the neighbor’s pool.
- Putting the hive in a low, damp spot where cold air and moisture collect.
- Choosing a site that is hard to reach when you have to carry heavy boxes.
- Leaving no space to work behind or beside the hive.
- Moving the hive a short distance later; foragers return to the old spot and get lost, so it is better to get the location right the first time.
If you do need to move a hive, ask an experienced beekeeper about the safest method for your situation before you start.
Get a second opinion
Local knowledge is valuable here. A beekeeping association or a mentor can tell you about local weather patterns, common pests and the plants that support bees in your area. University extension services also publish useful introductions, such as Penn State Extension’s Beekeeping Basics, an introductory guide written for people starting their first colonies. Keep in mind that advice from another region may need adjusting for your own climate.
Summary and site checklist
Your first hive will be easier to manage, and your bees will do better, if you choose its location with care. Before your colony arrives, walk through this list:
- Local rules and neighbors checked, and any sting allergies discussed.
- Morning sun on the entrance, with some afternoon shade in hot climates.
- Shelter from the prevailing wind on the windward side.
- Slightly raised, well-drained ground, not a frost pocket.
- A reliable, safe water source set up near the hive.
- Varied forage in the wider area through the season.
- Entrance facing away from paths, doors and seating, ideally with a screen in front.
- Easy access for heavy boxes, with room to work beside or behind the hive.
- A level, sturdy hive stand with a slight forward tilt for drainage.
- Local pests and wildlife considered.
Take your time with this decision. A good location will not solve every beekeeping problem, but a poor one will create problems you have to deal with every week.
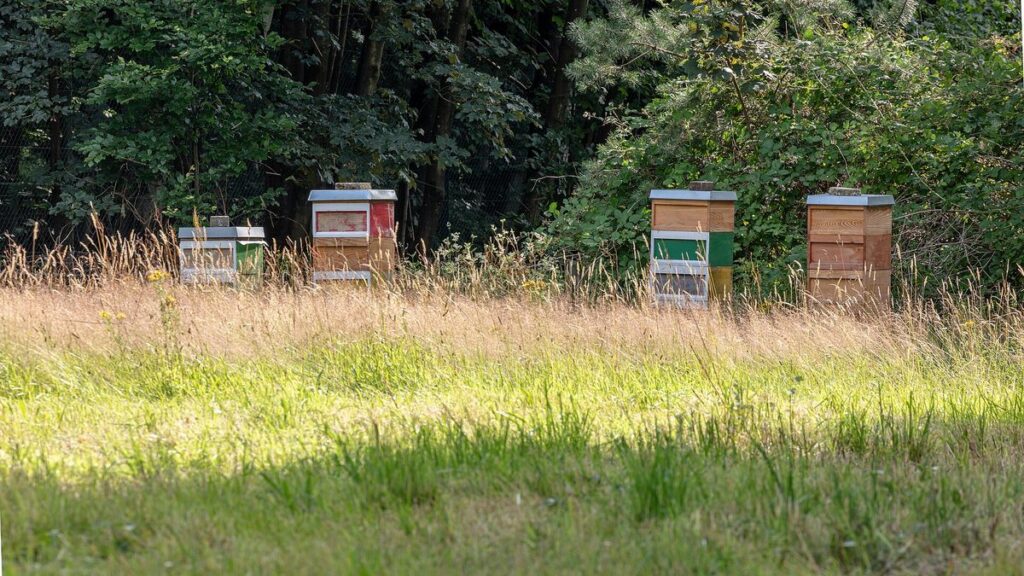
Photo: Dülmen, Kirchspiel, ehem. Munitionslager Visbeck, Bienenstöcke — 2024 — 4468, by Dietmar Rabich, license CC BY-SA 4.0, via Wikimedia Commons. Cropped.